(2022.12.24)(12.25)(2023.1.1)(1.16)(2.8)(4.12)(4.15) (5.3) (11.18)
サイクロン集塵機を作ろうと思います。以前から完全自作を考えていたのですが塩ビ管等の部材を買うのが伸び伸びになっていました。
I’m thinking of making a cyclone dust collector.
ネットを何気なく覗いているとサイクロン部だけが安く売ってたので、それを利用することにしました。
When I was casually browsing the internet, I found that only the Cyclone part was being sold cheaply, so I decided to take advantage of it.
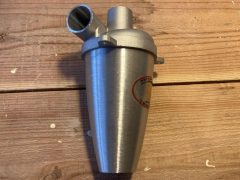
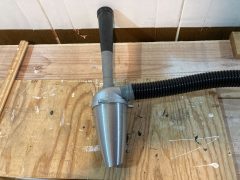
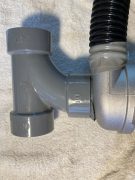
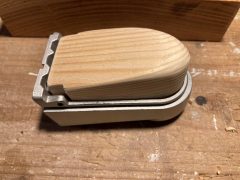
これがサイクロン部です。2,700円、黒いホースが1,900円
This is the cyclone section. 2,700 yen, black hose 1,900 yen
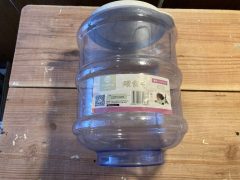
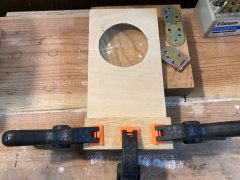
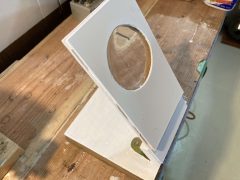
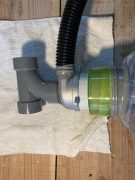
これは、犬の餌やり機のサイロ部分(廃材)This is the silo part (waste material) of a dog feeding machine
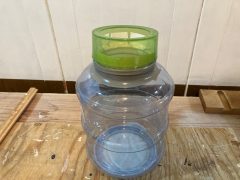
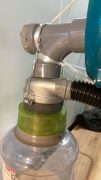
緑色の円筒状のものはハンドクリームの容器(廃材)で、異径アダプターとして使用
The green cylindrical item is a hand cream container (waste) and is used as a different diameter adapter.
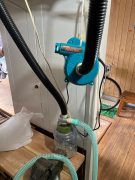
サイクロン部に購入したホースを横向きにビニールテープで繋いで、ゴミを吸うホースにしました。
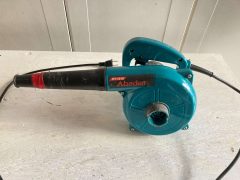
上方にはブロワーを繋ぎます。(通常は掃除機を接続します)
I connected the hose I purchased to the cyclone section sideways with vinyl tape to create a hose to suck up the garbage. Connect the blower to the top. (Usually connect a vacuum cleaner)

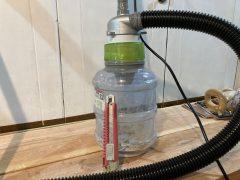
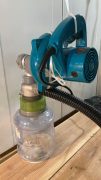
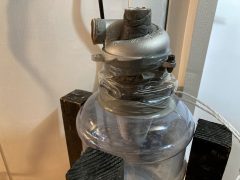
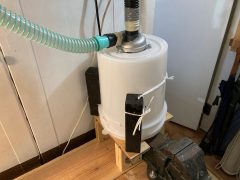
集塵タンク(エサ入れ)は高さ23センチ、直径16センチ 約5リットルとコンパクトです。ネットに出ているタンクは20リットルのペール缶などが主流みたいです。
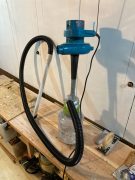
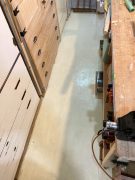
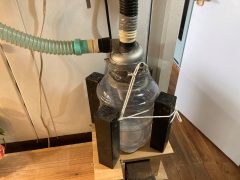
全体像はこんな感じです。タンクが20リットルだとテーブルが一杯になって鬱陶しくなりそうなので丁度良いサイズです。更に透明でゴミが視認出来ゴミ捨てのタイミングが判り易いです。
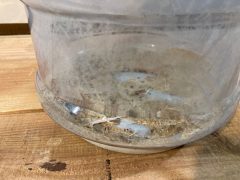
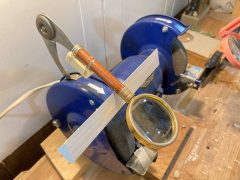
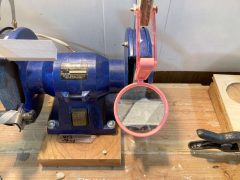
ブロワーをオンにして鋸屑を吸ってみました、ご覧の通りバッチリ集塵しています。ブロワーの排気からは粉じんは出ませんでした。これで実験は無事終了して、ちゃんと集塵出来ることが判りました。
掃除機のようなフィルターは付いてないので、溜ったゴミを捨てるだけでフィルタのお手入れは無くなります。作業ブースをほうきと塵取りで掃除するより楽になります。つづく。
I turned on the blower and sucked up the sawdust, and as you can see, it was collecting dust perfectly. No dust was emitted from the blower exhaust. The experiment has now ended successfully, and we have found that dust can be collected properly. It doesn’t come with a filter like a vacuum cleaner, so you can eliminate the need to clean the filter by simply throwing away the accumulated dirt. It’s easier than cleaning your work booth with a broom and dust pan. to be continued.
(12.25)
全高が高くて持ち運びに不便なので改良をします。
こんな塩ビのパーツが有ったので利用しようと思います。サイズが内径40とかなり大きいので一手間掛けなければなりません。

クッションテープなどを巻いて塩ビパイプの径に合わせてゆきます。
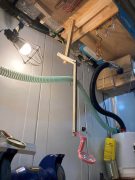
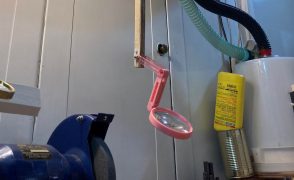
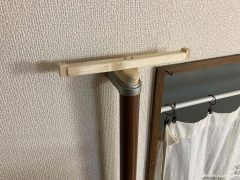
ブロワーは横向きになり高さは30センチ位低くなりました。下のゴミ溜りが軽すぎるので倒れないように上の棚から紐で吊るして支えています。
見えている紐はブロワーが抜けないように、塩ビパイプとブロワーを引っぱり合っています。

細かい部分の空気漏れも手直しました。つづく。
(2023.1.1)
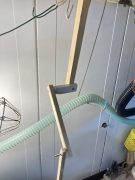
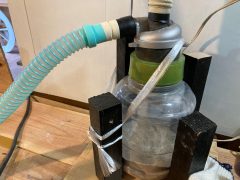
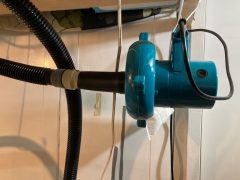
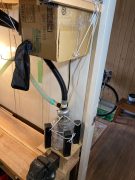
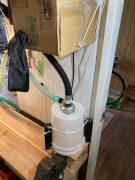
集塵タンクの上にブロワーを載せると頭が重くて直ぐに倒れるのでホース(黒色)を使ってタンクとブロワーを繋ぐように変更しました。写真の様にブロワーは空中に吊り下げています。
ゴミ吸引ホースは黄緑色のホース(ネット購入)になりました。
If you put the blower on top of the dust collection tank, the head will be heavy and it will fall over quickly, so I changed it to connect the tank and blower using a hose (black). As shown in the photo, the blower is suspended in the air. The garbage suction hose is now a yellow-green hose (purchased online).
動画をアップしましたので、お時間ある時にでもご覧ください。Please click to watch the video if you like.
(1.16)

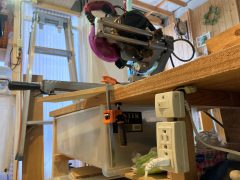
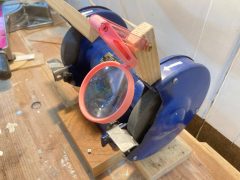
本日は卓上スライド丸鋸の作業をしたので、これに集塵機を繋いでみました。
Today I was working on a tabletop sliding circular saw, so I tried connecting a dust collector to it.
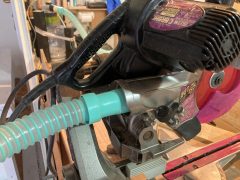
スライド丸鋸付属のダストシュートを外して吸引ホースを突っ込みます。
Remove the dust chute that comes with the sliding circular saw and insert the suction hose.
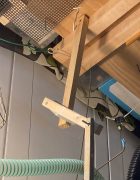
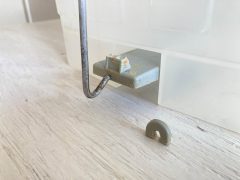
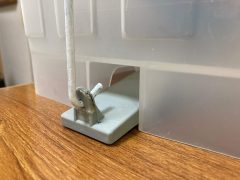
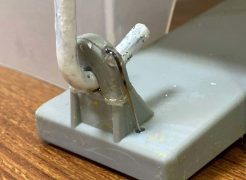
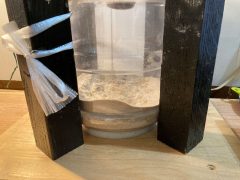
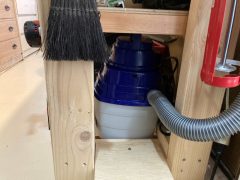
集塵タンクは軽くて倒れやすいのでサポートを作りました。黒い4本の木材で支えます。
The dust collection tank is light and easily falls over, so I made a support for it. It is supported by four black pieces of wood.
こんなに切子が溜まりました。
ジモティーで0円の掃除機をゲットするまではブロワーで吸います。相変わらず中吊り状態です。
スライド丸鋸近くにブロワーのスイッチを配置しました。
I placed the blower switch near the sliding circular saw.
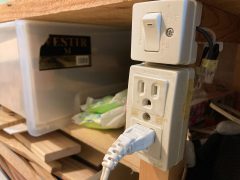
これはブロワーのスイッチです、設置して大正解でした。切断寸前にブロワーをオンして、切断終わったら直ぐにオフ出来ます。つづく。
This is the blower switch, and it was a great decision to install it. You can turn on the blower just before cutting and turn it off immediately after cutting. to be continued.
(2023.2.8)
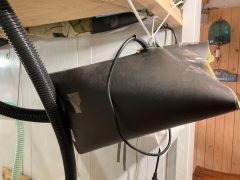
ブロワーは騒音が大きいので排水管の防音ゴムシートが残っていたので、それを巻き付けてみました。
気持ち音がソフトになりました。つづく。
The blower makes a lot of noise, so I had a soundproofing rubber sheet left over from the drain pipe, so I wrapped it around it. The sound has become softer. to be continued.
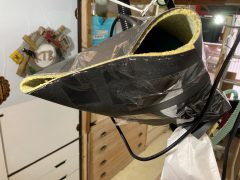
モーターの冷却のため全周塞ぐことは出来ないので少し開けています。
(4.12)
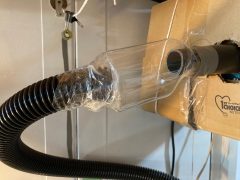
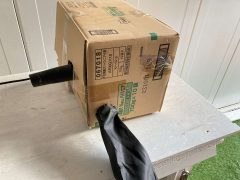
ブロワーは箱に入れました。
音も少しは、静かになった気がします。
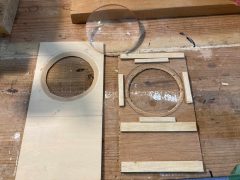
スライド丸鋸との繋ぎ部もペットボトル加熱縮ませ工法を使います。
The connecting part with the slide circular saw also uses the PET bottle heating method.
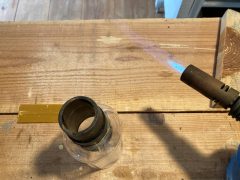
バーナーで加熱するとペットボトルは収縮して隙間は無くなります。
When heated with a burner, the plastic bottle shrinks and the gap disappears.
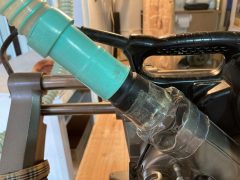
ホースもピッタリ繋がります。
サイクロン部もペットボトル過熱縮ませ工法でピッタリ繋ぎました。
これで、接続部の隙間は、ほぼ無くなりました。これで暫く様子を見ます。(つづく)
The gap between the connections is now almost gone. I’ll keep an eye on this for a while. (to be continued)
(4.15)
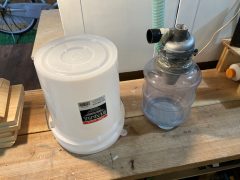
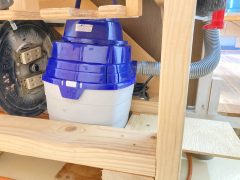
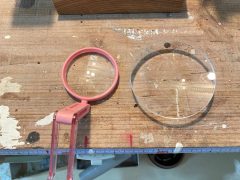
ネットで直径23㎝、10リットル蓋付き樹脂製バケツを購入したので、餌やり機のタンクと交換します。
餌やり機のタンク同様、フタを下にしたのでゴミを出す時はフタを開けるだけです。
I bought a 23 cm diameter resin bucket with a 10 liter lid online, so I will replace it with the feeder’s tank. Just like the feeder tank, the lid is facing down, so when you want to take out the garbage, just open the lid.
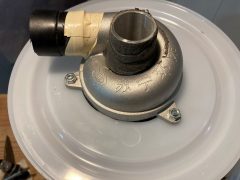
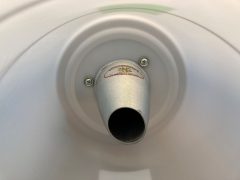
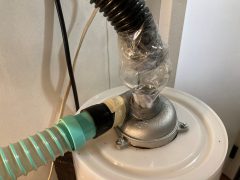
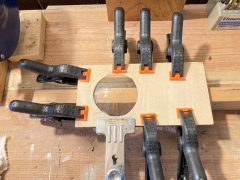
バケツの底部に80φの穴を開けてサイクロン部を挿入、ビスとナットで固定します。
Drill an 80φ hole in the bottom of the bucket, insert the cyclone part, and secure it with screws and nuts.
バケツの中から見たところです。
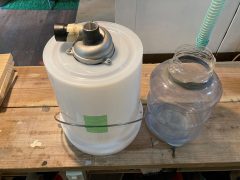
新旧交代ですね。バケツの取っ手は不要なので外します。
It’s a change of old and new. Remove the handle of the bucket as it is not needed.
餌やり機のタンクより安定感があります。
白色になったので中の様子が見えないのが残念です。ゴミの溜り具合も分りませんね。
吸引力を上げるためにブロワーを掃除機に替えると、布切れなどで吸い込み穴が塞がると餌やり機のタンクは潰れていましたが、バケツだと絶えてくれるのではないかと期待しています。そのうちテストをしたいと思います。(つづく)
Unfortunately, it’s white so I can’t see what’s inside. I don’t know how much trash is accumulated. When I replaced the blower with a vacuum cleaner to increase the suction power, the feeder’s tank would collapse if the suction hole was blocked with a piece of cloth, but I’m hoping that using a bucket will eliminate the problem. I would like to test it soon. (to be continued)
(5.3)
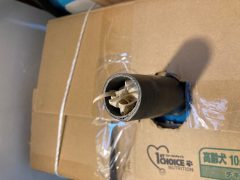
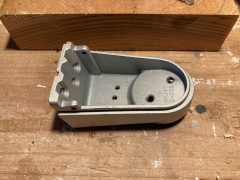
何気にブロワーの吸い口を外してみたら、何とカンナ屑が詰まっていました。
When I removed the blower nozzle, it was clogged with canna shavings.
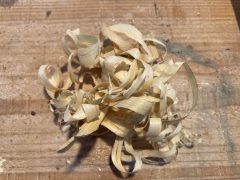
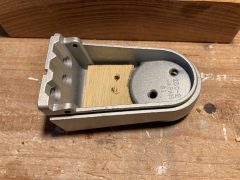
ほじくり出すと、こんなに出てきました。最近吸引力が弱い感じだった理由が分りました。このような風の抵抗を受けやすい大きくフワッとした物はサイクロンを通過するようです。
When I dug it out, this is what came out. I now know why the suction power has been feeling weak lately. Large, fluffy objects that are susceptible to wind resistance seem to pass through the cyclone.
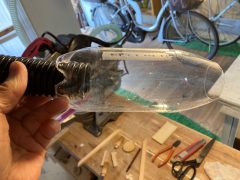
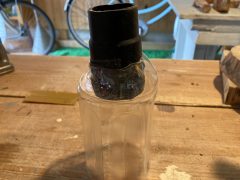
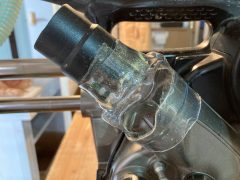
対策としてブロワー吸い口にペットボトルのジョイントを設けて詰まりが見えるようにします。
こんな感じです。As a countermeasure, install a plastic bottle joint on the blower mouthpiece to make the blockage visible.
ついでに、サイクロンの吸出し口も見えるようにしました。これで暫く様子を見ます。つづく。
I also made the cyclone’s suction port visible. I’ll keep an eye on this for a while. to be continued.
(11.18)
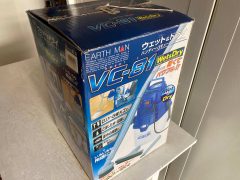
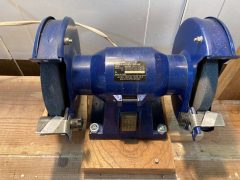
ジモティーで0円掃除機を、なかなかゲット出来ないのでメルカリで掃除機を入手しました。
I got a vacuum cleaner from Mercari.

こんな仕様で、小型で場所を取らない所が気に入りました。吸い込み能力は感覚的にはブロワーの4倍くらいなのでパワーアップが出来ました。
I like the fact that it is small and doesn’t take up much space. The suction capacity is about 4 times that of a blower, so I was able to increase the power.
作業台の下に収まりました。
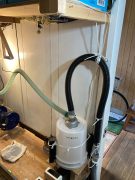
集塵器は今迄と同じ位置です。The dust collector is in the same position as before.
これ迄 吸引を担ってくれたブロワー君は取り外して
本来のホコリ吹き飛ばし業務に復帰する事になり年末掃除などに活躍してくれると思います。
The blower that does the suction will be removed and returned to its normal job of blowing away dust, so I think it will come in handy for year-end cleaning and other tasks.
.jpg)