(2024.4.6)(4.12)(4.15) (4.20)(5.12)(5.13)(5.13) (5.23) (5.30)(6.7)(6.10)(6.30) (7.15) (7.19)
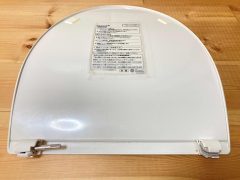
ウォッシュレットの蓋の部品が脱落して動きがガクガクし始めて3日目くらいにユックリしまっていた蓋が早く閉じるようになったので分解することにしました。
It was so sad to see the little toilet seat cover part come loose and make the toilet seat move around a bit. It was only after three days that the toilet seat cover started to close more slowly, so I decided to take it apart to see what was going on.
取説が無かったのでネットからダウンロードして取外し取り付け方法などをみてスタートです。
There was no instruction manual, so I downloaded it from the Internet and started the repair after reading the removal and installation instructions.
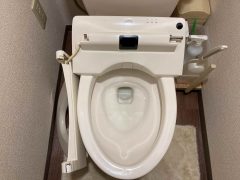
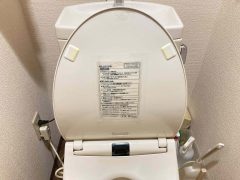
便座と蓋をセットで取り外します。Remove the toilet seat and lid as a set.
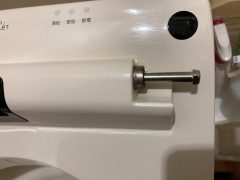
これは右側のヒンジ部異常なし。There is no abnormality in the right hinge.
これは左のヒンジ部かなり汚れていたのでクリーニングしてこの通り This left hinge part was quite dirty, so I cleaned it and looked like this.
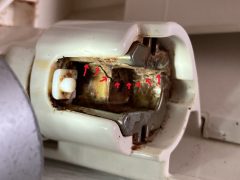
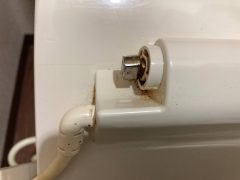
左のヒンジの受け側が汚れで真っ黒でした。汚れをウエスで拭き取ると、金属製部品に赤色矢印のヒビが入っている様に見えるので取り出しました。
The receiving side of the left hinge was black with dirt. After wiping off the dirt with a rag, I removed what appeared to be a red arrow crack in the metal part.
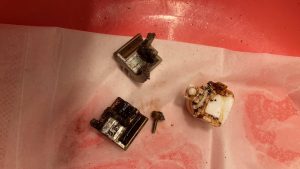
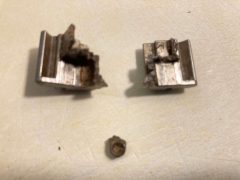
やはり金属製のパーツが、真っ二つに割れていました。As expected, the metal parts were broken in two.
この後は写真が無いのですが、割れた部品をシンナーで洗浄してエポキシパテで繋ぎ合せたら、何とかくっついてくれたので元の位置に挿入して便座と蓋を復旧すると以前の動きが蘇りました。修理完了ですが、今後接着部が剥がれる可能性もあるので部品を購入したいのですが製造終了部品の様です。つづく
I don’t have any pictures after this, but after cleaning the broken parts with thinner and joining them with epoxy putty, they managed to stick together, so I inserted them in their original positions and restored the toilet seat and lid, and the previous movement was restored. The repair is complete, but there is a possibility that the glued parts may peel off in the future, so I would like to purchase the parts, but they seem to be discontinued parts. To be continued
(4.12)
エポキシパテの強度不足で再度割れてしまいました。It cracked again due to the lack of strength of the epoxy putty.
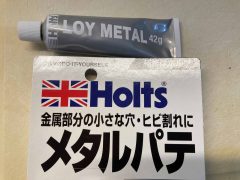
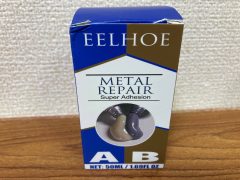
今度は金属パテを使います。This time I will use metal putty.
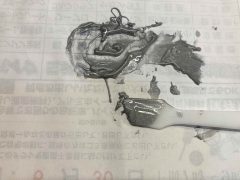
こんな感じです。硬化に24時間掛かるのでノンビリやりたいと思います。つづく。It is like this. It takes 24 hours to harden, so I would like to do it straight away.to be continued
(4.15)
パテが固まってからこの部品を組み込んで修理完了となった。暫く経過観察します。つづく。
After the putty had hardened, the parts were installed and the repair was completed. I will observe the progress for a while. to be continued.
(4.20)
エポキシ系のパテは強度不足で再び割れてしまいました。次は金属粉入りの物を取り寄せることにしました。 The epoxy putty was not strong enough and cracked again. Next time, I will order the one with metal powder.
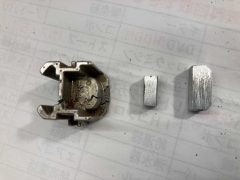
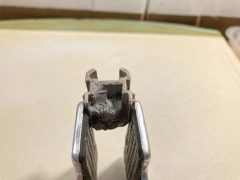
同時にアルミ製のブロックを補強を兼ねて挿入して At the same time, insert an aluminum block for reinforcement.
こんな形にして接着したいと思います。次の接着剤の到着は5月初め輸入に時間が掛かるみたいです。つづく。
I would like to glue it like this. It looks like the next batch of adhesive will arrive in early May, which will take some time to import. to be continued.
(5.12)
連休明けの到着予定が遅れて11日になりました。The scheduled arrival after the holidays was delayed to May 11.
早速修理を始めました。Repairs began immediately.

準備していたアルミ製ブロックと一緒に接着しました。I glued it together with the aluminum block I had prepared.

逆側の亀裂部分にも少し盛りました。I also heaped a little on the crack on the opposite side.

この状態で24時間硬化するのを待ちます。つづく I will wait for 24 hours for it to cure in this condition. To be continued
(5.13)

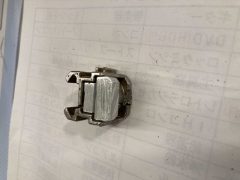
パーツを組み込むためにはみ出したパテを丁寧に削る作業をして組み込むことが出来ました。I am able to incorporate the parts by carefully scraping off excess putty to incorporate the parts.
硬化を確実にするため明日取り付けて開閉動作の確認をします。つづく To ensure hardening, the parts will be installed tomorrow to check the open/close operation. To be continued
(5.13)
カバーを開けた状態(取り付け時の状態)で1日経ったので閉めの動作を確認したいと思います。After one day with the cover open (as installed), I would like to check the closing operation.

始めから最後までユックリと閉まりました。ヒンジ部品の割れは今のところ大丈夫です。暫く経過観察しながら使います。It closed smoothly from the beginning to the end. The cracks of the hinge parts are fine so far. I will use it while observing the progress for a while.
(5.23)
経過観察3日目で又割れてしまいました。パーツをプラスチックの中に収めるためにパテを厚く出来ず強度が足りない事が原因の様です。 On the third day of observation, it cracked again.It seems that the reason for the lack of strength is that I could not make the putty thick enough to fit the parts into the plastic.
今回は一気に固めづに4回に分けて接着を行ないます。This time, we will glue the parts in 4 parts instead of hardening them all at once.

更に針金を併用して金具の分裂防止を図りたいと思います。針金を固定するためにも1回で固める事は止め少しづつ針金を締め付けながら固めていきます。Further, we will use a wire to prevent the metal fittings from splitting. In order to fix the wire, we will not fix it at once, but will tighten the wire a little at a time.

それからアルミ製ブロックに穴を開け針金を通すことにしました。And then, we decided to make a hole in the aluminum block and put the wire through it.

針金を捻じってから接着で固めました。I twisted the wire and glued it in place.

最後に接着剤(パテ)の薄い箇所に肉盛りをしました。この状態で3日程待って硬化を待ちたいと思います。つづく Finally, I put a layer of filler on the thin adhesive (putty). I will wait 3 days for the adhesive to harden. To be continued
(5.30)
試用を開始しました。つづく
(6.7)
試用開始7日目で亀裂が入りました。今回は針金で補強していたので亀裂は入ったものの二つに分裂はしませんでした。何か対策をしなければこれの繰り返しになります。
After 7 days of trial use, a crack appeared. This time, it was reinforced with wire, so although it cracked, it did not split in two. If we do not take some measures, this will repeat itself.
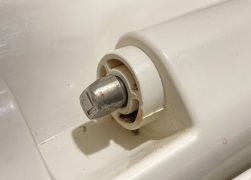
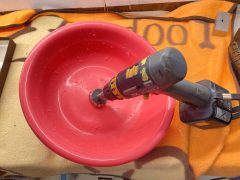
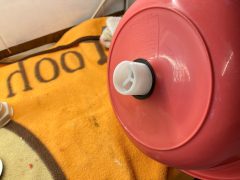
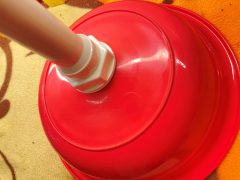
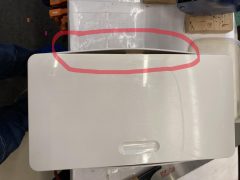
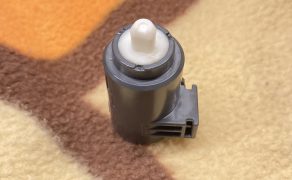
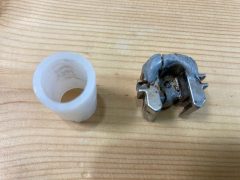
この写真は蓋が閉まる時にユックリ閉じるダンパーとの接続パーツです。これをペンチで挟んで回すと物凄く硬い事が判りました。この固さがパーツを破壊する原因の様なので、分解してダンパー部を調べたいと思います。
This picture shows the connecting part with the damper that closes the lid when it is closed. When I put it between pliers and turned it, I found that it was very hard. I would like to disassemble it and examine the damper part, because I think this hardness may be the cause of breaking the part.

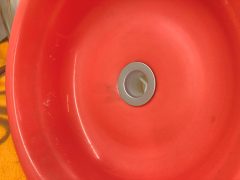
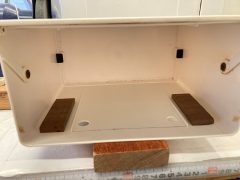
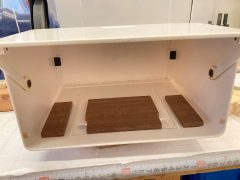
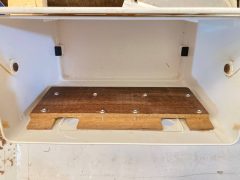
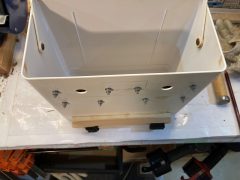
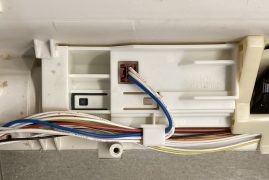
本体を分解したところです、赤丸の部分にダンパーが入っているようです。
Here is a picture of the main unit disassembled.
The damper seems to be in the part circled in red.
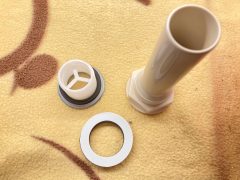
この中です。This is the inside of the damper.
中にはこのようなダンパーで白い部分が回る部分です。There is a damper like this inside, and the white part is the part that rotates.
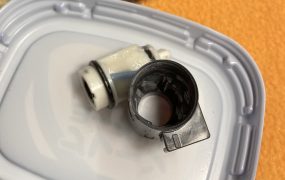
更に分解すると Further disassembling
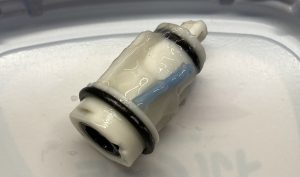
中に固い半透明のグリスみたいなものが入っていました。このグリス経年変化して固くなっているようです。全部取り除くと軽くなり過ぎたので半分戻して復旧することにしました。
Inside the damper, there was a hard translucent grease-like substance. This grease seems to have hardened over time. If I removed all of it, it would turn too lightly, so I decided to put half of it back and restore it.
これでパーツに亀裂が入らなくなると思います。
I think this will prevent the parts from cracking.
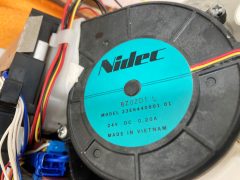
これは脱臭装置のブロワーです。覗くとホコリがこびり付いていたのでブラシで掃除しました。これで吸引力が上がると思います。組立て復旧しました。亀裂修復は硬化するまで時間が掛かります。つづく
This is the blower of the deodorizer. When I looked at it, I found dust stuck to it, so I cleaned it with a brush. I think this will improve the suction power. Assembly has been restored. It will take a little more time for gluing. To be continued
(6.10)
試用開始しました。蓋が思いっきり閉まりまじめたのでダンパーに手持ちのシリコングリスを入れると少し減速するようになりました。これで様子を観察することにします。つづく
I started the test again. The lid was closed tightly, so I put some silicone grease into the damper and it started to slow down a little. I’ll keep watching how it goes. To be continued.
(6.30)
その後の経過は良好でヒンジ部品に亀裂の兆候は有りません。グリースの量が少ない又は粘性が弱く蓋が閉まる時の抵抗が足りずに直ぐに閉まります。つづく
After that, the progress was good and there is no sign of cracks on the hinge parts. The amount of grease is too little or the viscosity is too weak, so there is not enough resistance when the lid closes, and it closes quickly. To be continued
(7.15)
本日ヒンジパーツの点検のため分解したら又もや亀裂が入っていました。低粘性グリースの注入でパーツへの負荷はかなり軽減していたのですが、針金を使った補強をしても 亀裂が入りました。
Today I disassembled the hinge parts for inspection and found them cracked again. The load on the parts had been considerably reduced by injecting low-viscosity grease, but the cracks appeared even after reinforcing with wire.
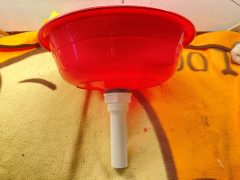
そこで亀裂部品の補強修理は見切りを付け 蓋のソフトクローズ機能を捨てる事にしました。ヒンジパーツを樹脂製のパイプで代用して、ダンパーを回すシャフトとは嚙み合わせないことにしました。
So we gave up on repairing the cracked parts and decided to abandon the soft-close function of the lid. We substituted the hinge parts with plastic pipes and decided not to mesh them with the shaft that turns the damper.
蓋は重力に逆らうこと無く、あっという間に閉まりますがヒンジ部分を壊す心配は無くなりました。The lid closes quickly without defying gravity, but there is no longer any danger of breaking the hinge part.
(7.19)
樹脂製パイプによるヒンジでは不都合が出てしまいました。ダンパー内に蓋のイチセンサーが内蔵されてビデの動きが変になったり 脱臭ファンが常時回りっぱなしなったり という現象が発生しました。
The hinge with the plastic pipe has become inconvenient. The lid sensor is built into the damper, causing the bidet to move strangely and the deodorizing fan to run constantly.
対策として ダンパーのグリースを全部取り除き抵抗無し状態にすることで 抵抗が無いのでヒンジ部品が壊れる無くなって ダンパーの回転は通常通りに戻って 蓋の位置センサーが機能するようになりました。これで あと何年か使用できると思います。終わり
In order to solve the problem, we removed all the grease from the damper and made it resistorless, so that the hinge parts would not break because of the lack of resistance. I think it will last for a few more years. The End