令和6年能登半島地震の御見舞と早い復興を願います。 私は趣味としてDIYを楽しんでいて小さな物から大きな物まで修理したり作成したりしています。 (写真:梅津正道隊員撮影)We would like to express our condolences to the Noto Peninsula Earthquake of 2020 and wish for a speedy recovery. I enjoy DIY as a hobby, repairing and creating things from small to large items. (Photo: Photographed by Masamichi Umezu)
The amp’s volume is not working well, specifically, I sometimes can’t hear the right channel.
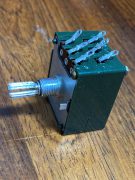
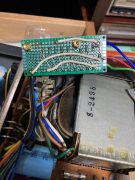
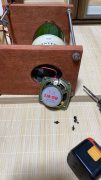
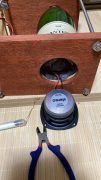
この緑色の四角いのがボリュームです。
無水エタノールとエアーで掃除したいのですが、うまく分解出来なくて
隙間から接点復活剤を吹き込んだものの、更に調子が悪くなりました。
友人がボリュームをプレゼントしてくれたので、交換することにしました。
My friend gifted me a volume, so I decided to exchange it.
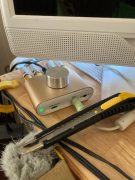
交換後の写真です。今度のボリュームは丸形です。これで暫く使って経過観察します。
とにかく、40年選手なのでアチラコチラにガタが出てきてます。
でも、それを楽しみなが修理しいます。つづく。
This is a photo after the exchange. This time the volume is round. I’ll use this for a while and see how it goes. Anyway, I’ve been a player for 40 years, so I’m starting to get loose here and there. But I’m looking forward to fixing it.
(12.12)
更新が遅れてしまいました。老犬の体調が2度に渡り崩れて介護をしていました。
私の腕では怪しいので、茨城県阿見町に住む師匠のお力をお借りして修理を進めることにしました。
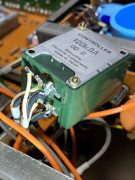
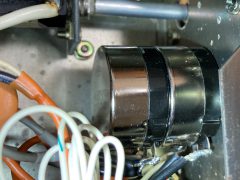
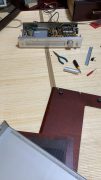
オペアンプ部の計測をすると、値がおかしい所がありました。図面を頼りに探求してゆくと
電源部にたどり着きました。すると、電圧調整部のツエナ―ダイオードが黒焦げになっていました。
When I measured the operational amplifier section, there were some strange values. As we explore while relying on the drawings, We arrived at the power supply section. Then, the Zener diode in the voltage regulator was charred.
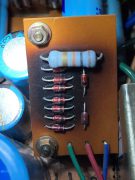
これが作り替えた交換用基板です。これでオペアンプが正常に動作出来ます。
これで試運転して音を聞きて様子を見ます。つづく。その後の調子はまずまずです。
This is the replacement board I made. The operational amplifier can now operate normally. Now I’m going to test drive it and listen to the sound and see how it goes.
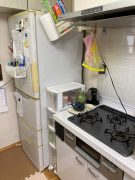
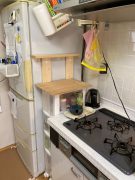
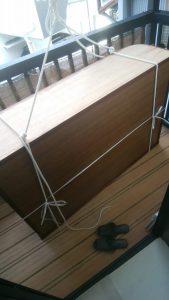
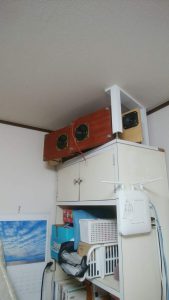
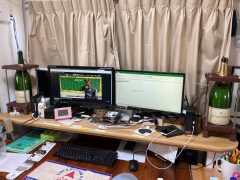
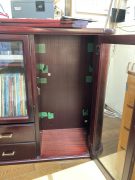
I decided to use the living room board on the second floor as an audio rack on the third floor. Since it was impossible to move up the stairs, I took a rope from the second floor to the third floor via the balcony.
2階で吊り上げ準備中。Preparing for hoisting on the second floor.
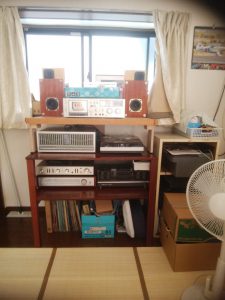
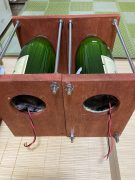
作業前の状態 Condition before work
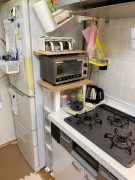
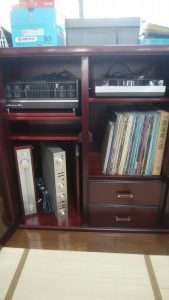
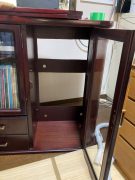
作業後。扉もあるのでホコリが入りにくいはず。
After work. There is also a door so dust doesn’t get in easily.
出窓をクリアーにすることが、奥様のオーダーでした。
It was the wife’s order to clear the bay window.
唯一、スピーカー置き場が未確定。取りあえずここに置きました。
The location of the speakers has not yet been determined. I put it here for now.
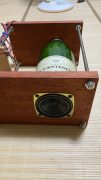
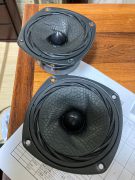
The new unit is called ONKYOU’s OM-OF101. 10cm full range speaker.
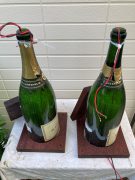
今迄、こんな可愛いアンプで下のフラットスピーカーを鳴らしていました。
このアンプに今回の改良スピーカーを繋いだところ、低音がかなり出ている感じがします。
このフラットスピーカーは15年選手です。薄くて軽量なのでどこにでも置けて便利です。つづく。
(2021.9.5)
スピーカーを置く位置は奥様と相談して、机の上に決まりました。
心の中では、天井から吊り下げようと考えていましたが、却下されました。
After consulting with my wife, we decided on the location to place the speakers on the desk. In my mind, I was thinking of hanging it from the ceiling, but that was rejected.
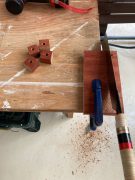
一旦バラシて木部のカット再塗装と短い脚を作成しました。
Once I took it apart, I cut and repainted the wood and created short legs.
足を作成中 Creating legs
再塗装 Repaint
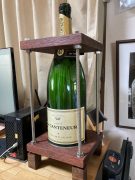
組立て完了、音は下に出て脇から漏れ出てきます。脇のスペース確保のために短い脚を履かせました。
Assembled, the sound comes out from the bottom and leaks out from the sides. I made her wear short legs to provide more space under her arms.
PCディスプレイの横に置きました。つづく。I placed it next to my PC display.
(2021.9.12)
ケーブルとスピカー切り替え器を購入。
(2021.9.13)
ステレオの接続と電源を入れることにしました。
何と15年振りに電気を入れたいと思います。
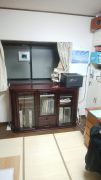
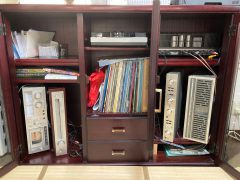
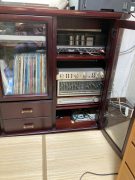
リビングボードを利用します。右側上段がパワーアンプ、
下段にプリアンプとグラフィックイコライザー。
中央上部にプレーヤー、下段にレコード。
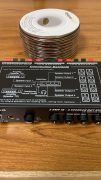
左下段にチューナーとカセットデッキを配置しました。
横に置けたのはメインアンプとプレーヤーの二つで、残りは横には収まらず縦置きになりました。
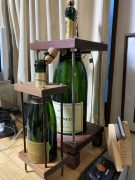
この機械類は40年選手です。一番の若手はボトルスピーカーでボディーは14年目です。
ほぼ動きましたが、カセットデッキはテープが無くて動作確認できません。
多分ゴムパーツの劣化等で動かない予感がします。カセットテープを入手したいと思います。
これでアナログサウンドを楽しむ事が出来ます。
長い間、ご無沙汰した分老後を利用して楽しみたいと思います。
(2021.9.18)
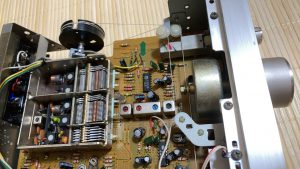
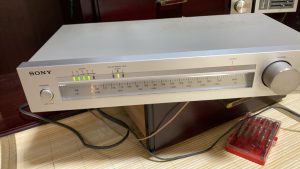
チューナーの選局ダイアルが渋くて回す時に凄く硬いので、分解して様子を見ます。
The tuner’s selection dial is so stiff that it’s very hard to turn, so I’m going to disassemble it and see what happens.
The round thing you see on the right side of the photo is the dial. When you turn this, a thread is stretched to the black round part at the top left of the photo, and the black round part rotates to change the frequency. While I was investigating the movement, the thread came loose and I was in a lot of trouble.
2時間半くらい費やし、最終的にはクルクル回るようになって昔の感覚に戻りました。
It took about two and a half hours, and in the end I started spinning around and returned to my old feeling.
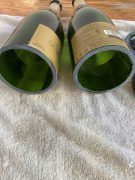
When I play it, it feels so good that I can’t believe it’s only 6cm long. I would like to enjoy listening to it and comparing it with the first generation for a while.