ミニサイクロン集塵器 mini cyclone dust collector

新規(2023.12.3) 

追記更新 Additional update(12.4)(12.6) (12.8) (12.15) (12.17) (12.20)(2025.4.26)

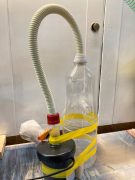
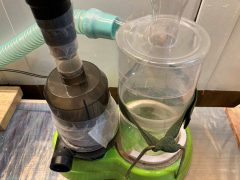
小さな集塵器を作ってみました。I made a small dust collector.

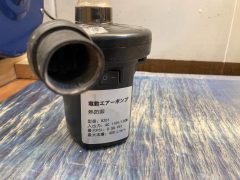
非力な空気ポンプweak air pump

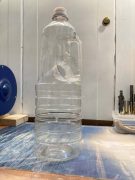
ペットボトルのタンク plastic bottle tank

作った目的は、バイト先で良く出る珪藻土の粉ゴミを上手く集塵出来るか実験をする為です。

The purpose of making it was to conduct an experiment to see if it could effectively collect the diatomaceous earth dust that is often found at part-time jobs.

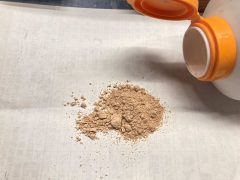
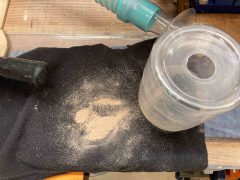
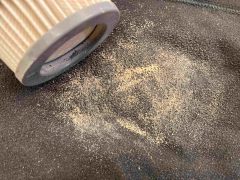
これが、珪藻土粉です。This is diatomaceous earth powder.

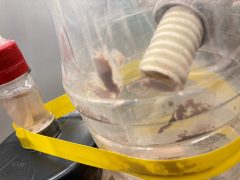
吸うには吸いますが、吸ったとたんにタンク内が粉だらけになり何も見えなくなります。

As soon as you smoke, the inside of the tank becomes full of powder and you can’t see anything.

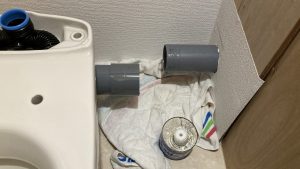
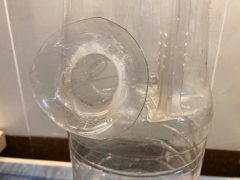
タンクに粉は溜まるのですが空気ポンプのフィルターに到達しました。粉以外のゴミはタンク内に留まるのですが、煙状態の粉はタンクから吸い出されてしまうようです。

Powder accumulates in the tank, but it reaches the air pump filter. Debris other than powder remains in the tank, but powder in smoke form seems to be sucked out of the tank.

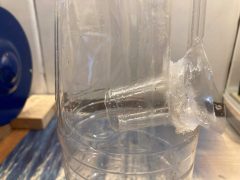
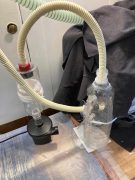
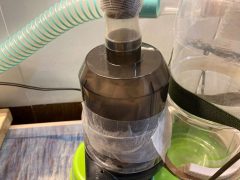
右に突き出た小さいペットボトルがフィルターです。The small plastic bottle that sticks out to the right is the filter.

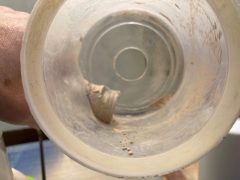
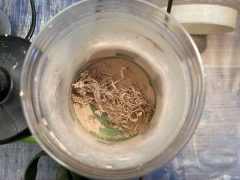
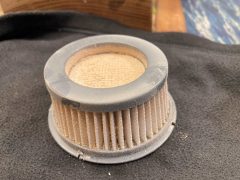
フィルターをはずして、中を覗くとRemove the filter and look inside

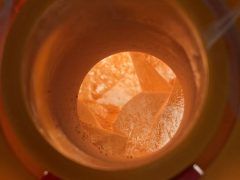
白いフィルターが褐色になって細かい粉が見えました。珪藻土の粉は粒子が細かすぎてむりなのか?(つづく)

The white filter turned brown and fine powder was visible. Is diatomaceous earth powder too small to be useful? (to be continued)

(12.4)

粉で汚れたので 水洗いして動画撮影に備え、少し改良をします。

It got dirty with powder, so I washed it with water and made some improvements in preparation for video shooting.

空気ポンプを逆さに使います。Use the air pump upside down.

ペーパーフィルターは紐で縛って取り付けます。Attach the paper filter by tying it with a string.

タンクの上に逆さまにポンプが繋がっています。白いのがペーパーフィルターです。つづく

The pump is connected upside down to the top of the tank. The white one is a paper filter. to be continued

(12.6)

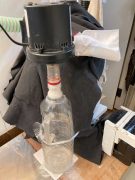
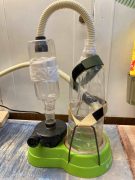
少し設計変更をしました。空気ポンプに珪藻土粉が入るのを防ぐためにフィルター位置を空気ポンプの前にしました。

I made a slight design change. The filter was placed in front of the air pump to prevent diatomaceous earth powder from entering the air pump.

半分に切ったペットボトルでフルターを挟んだ形のフィルターを作ってみました。よって、逆さ空気ポンプは取り止めました。つづく

I made a filter with a filter sandwiched between a plastic bottle cut in half. Therefore, the inverted air pump was discontinued. to be continued

(12.8)

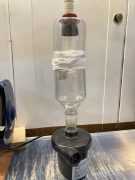
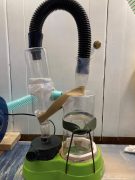
ホースで繋いでみるとペットボトル製タンクが軽すぎて直ぐ倒れて自立しないので

When I tried connecting it with a hose, the plastic bottle tank was too light and would easily fall over and not stand on its own.

犬の水やりお皿を利用してポンプとタンクの位置を固定したので、グラグラしなくなりました。つづく

I fixed the pump and tank in place using a dog watering dish, so they no longer wobble. to be continued

(12.15)

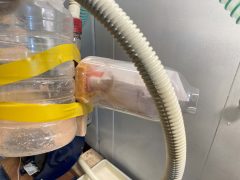
一度 粉の吸引実験をした結果、白いホースの蛇腹のヒダに粉が溜ってしまい、集塵器まで到達しませんでした。 ホースをジャバラの無い物に変更するなどして作り直します。つづく

Once, when we conducted a powder suction experiment, the powder accumulated in the folds of the bellows of the white hose and did not reach the dust collector. Rebuild by changing the hose to one without bellows. to be continued
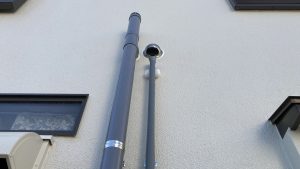
(12.17)

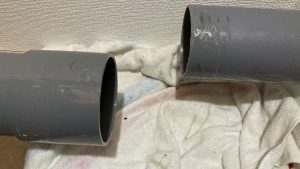
基本構成は同じ、タンクを味付け海苔の容器を2個つないだ形に変更ホース類を内径14ミリから32ミリにサイズアップしました。 ジャバラの無いホースは無いことが判りました。軽いホースは強度を確保するためにどうしてもジャバラ構造又はコイルにする必要があるようなのでホース径を大きくすることにしました。

これで実験をしたいと思います。つづく

The basic configuration is the same, but the tank is shaped like two containers of seasoned seaweed connected together, and the inner diameter of the hoses has been increased from 14 mm to 32 mm. It turns out that there are no hoses without bellows. It seems that a lightweight hose must have a bellows structure or coil to ensure strength, so we decided to increase the hose diameter. I would like to experiment with this. to be continued

(12.20)

フィルターを廃材プラ容器を利用して高さを低く変更してみました。

I tried lowering the height of the filter by using a waste plastic container.

宜しければ動画もご覧ください。 実験動画  Please click to watch the video if you like.

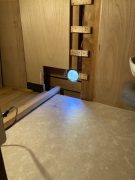
左がフィルター、右が集塵タンク。The filter is on the left, and the dust collection tank is on the right.

ホースとフィルターはペットボトルをバーナーで加熱して収縮させたもの。

The hose and filter are made by heating a plastic bottle with a burner and shrinking it.

さー実験で珪藻土の粉を吸ってみました。

As an experiment, I tried smoking diatomaceous earth powder.

集塵タンク入り口は粉がへばり付いています。The entrance to the dust collection tank is caked with powder.

タンク内部は壁面がかなり汚れています。The walls inside the tank are quite dirty.

衝撃を与えると落ちてきました。It fell when I gave it a shock.

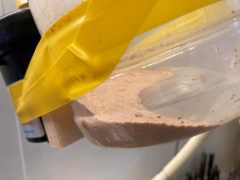
タンク下部 薄茶色の物が粉。糸くずみたいな物は以前吸ったペットボトルの削りカス。

At the bottom of the tank, the light brown substance is powder. The lint-like thing is shavings from a plastic bottle I used to smoke.

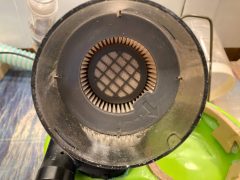
空気ポンプからフィルターを外しました。I removed the filter from the air pump.

更にフィルターを抜き取ると、こんな感じです。

真っ白だったフィルターは粉まみれです。タンクでキャッチ出来なかったものが、ここまで来ています。

The filter, which was pure white, is now covered in powder. What we couldn’t catch in the tank is now here.

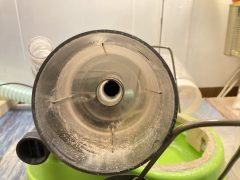
衝撃を与えても、この程度しか落ちません。フィルターは水洗いが必要です。

Even if you give it a shock, it will only fall by this amount. The filter needs to be washed with water.

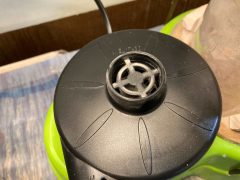
ポンプ入り口にも薄っすらと粉が着いています。

There is also a thin layer of powder at the pump entrance.

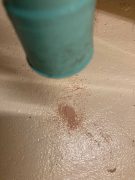
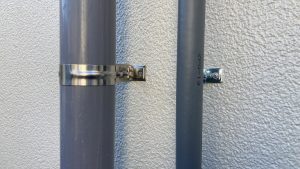
吸引ホース内壁にも、へばり付いた粉があります。

結論は、一般的なゴミは集塵タンク部で捉えることが出来ますが、粉体は30%程度サイクロン部を通過する事が判りました。今後パウダー状の特殊なものは吸わない様にします。

There is also powder stuck to the inner wall of the suction hose. The conclusion was that general dirt can be captured in the dust collection section, but about 30% of powder passes through the cyclone section. From now on, I will avoid sucking up special powder-like materials.

(2025.4.26)

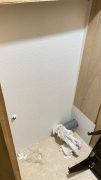
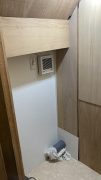
その後1年以上 洗濯乾燥機の糸くずの掃除用として使っていますが この頃ゴミタンク容量が足りなくなったので容積アップする事にしました。

“For over a year, I have been using it to clean lint from the washer-dryer. However, recently the dust tank capacity has become insufficient, so I decided to increase its volume.

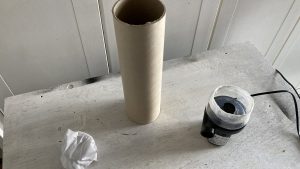
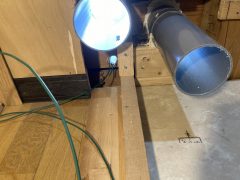
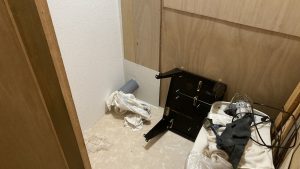
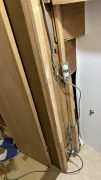
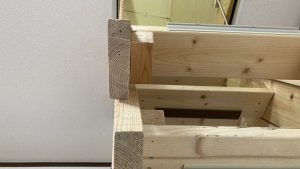
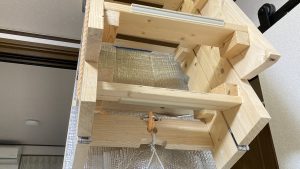
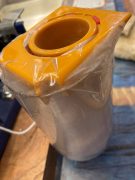
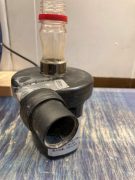
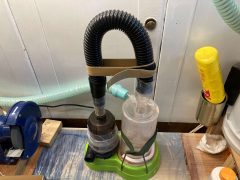
容積を40%ほどアップしたのでポンプの配置を横向きに変更する事にしました。写真は空気ポンプとポンプを木製台に固定するための厚紙製の筒です。

I increased the capacity by approximately 40%, so I decided to change the pump’s configuration to a horizontal position. The photo shows the air pump and a cardboard tube used to fix the pump to the wooden stand.

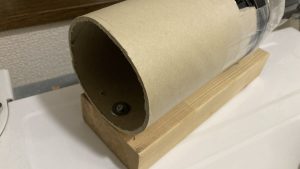
横向きになったポンプ The pump turned to a horizontal position

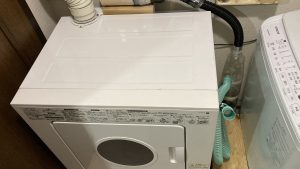
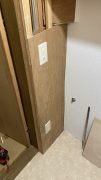
乾燥機と洗濯機の間にゴミタンクが在ります。背高になりました。 The dust tank is located between the dryer and the washing machine. It has become taller.

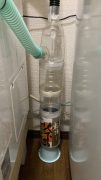
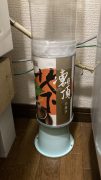
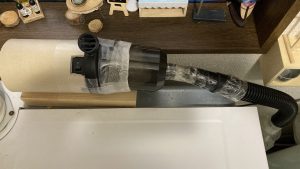
同サイズのペットボトルが無かったので 中国茶の缶を利用しました。 Since there wasn’t a plastic bottle of the same size, I used a Chinese tea can instead.

以前は5日位でタンクが一杯になっていましたが 倍は溜めれそうな気がします。

Previously, the tank would fill up in about five days, but now it seems it can hold about twice as much.

自転車タイヤ交換 Bicycle Tire Replacement

(2025.4.18)

自転車の後ろタイヤが裂け始めているので、予備の中古タイヤに交換しました。 The rear tire of my bicycle started to tear, so I replaced it with a spare used tire.

大きいきれつが3つ在りました、 最近変な振動を感じていたのは、気のせいではありませんでした。

There were three large cracks, and the strange vibrations I had been feeling recently were not just my imagination.

作業時間は2時間、交換後の写真です 作業中の写真は撮影出来ませんでした。 The work took two hours. Here’s a photo after the replacement. I wasn’t able to take any pictures during the process.

プリンター置き場 Printer Space

(2025.4.7)

出窓にプリンターを置いていたら 妻に出窓はクリアーにして欲しいと リクエストされました。 I placed the printer on the bay window, but my wife requested that I keep the bay window clear

リビングボードと本棚の間に 板を渡して こんなふうに してみました OK出る事を祈ります。  I placed a board between the living board and the bookshelf, and this is what I came up with. I hope it gets the OK.

端材を使用して高さ調整しました 棚板の端にスキャナーを載せました。  I used scrap wood to adjust the height and placed the scanner at the edge of the shelf board.

DIY繋がりの知人宅にトイレ増設  Adding a toilet to a friend’s house through DIY connections.

(2024.11.15) (11.20) (11.30) (12.7) (12.9)(12.12)(12.21)(12.23) (2025.1.30)

トイレの増設作業は知人(写真の家の主人)との共同作業になります。The expansion work will be a joint effort with an acquaintance (the owner of this house).

2階の写真中央部に在る半畳のクロークをトイレにします。それから隣に在る階段下収納も利用する予定です

The half-size cloakroom in the center of the photo on the second floor will be used as a toilet. We also decided to use the storage space under the stairs next to it.

右の扉がクローク です。The door on the right is the cloakroom.

中は半畳のクロークになっています。Inside is a half-size cloakroom.

階段下収納間の壁を取外して 階段下収納に25cm侵入することで トイレ使用時の足元のスペースを45センチ確保できました。

By removing the wall between the under-stair storage and extending the storage area by 25 cm, I was able to secure an additional 45 cm of foot space when using the toilet.

半畳では かなり狭いトイレになるところでした 階段下収納に感謝します。

Without the extra half tatami mat, the toilet would have been quite cramped. I’m grateful for the under-stair storage.

この便器を設置します。床排水タイプは大変な作業になるので 壁排水タイプを採用しました。つづく

Install this toilet bowl. Floor drainage is too difficult, so wall drainage is used. To be continued

(11.20)

照明、換気扇のスイッチとコンセントを仮付け クッションフロワーシートを張りました。

I temporarily installed the switches for the lighting, ventilation fan, and outlet and laid down the cushion floor sheet.

実は スイッチとコンセントの白いボックスは 後で撤去することに なります。

The white boxes for the switches and outlets will be removed later.

便器を仮置きして位置を決め

排水エルボー管を取付け壁の穴開け位置を決めて Temporarily place the toilet bowl and decide its position, attach the drainage elbow pipe, and determine the position for drilling the hole in the wall.

外壁に穴を開けました。I drilled a hole in the exterior wall.

次の工事まではボロ布で塞ぎます。つづく

We will cover it with rags until the next construction. To be continued

(11.30)

前回開けた孔に塩ビ管を取付けて 更に換気と水道の穴を追加しました。  I installed a PVC pipe in the previously drilled hole and made openings for ventilation and water supply.

外はこんな感じです。 This is how it looks outside.

拡大写真 左の穴は排水 右の大きい穴は換気 小さい穴は水道です。つづく

Close-up photo: The left is the drainage hole, the large one on the right is the ventilation hole, and the small one is for water supply.To be continued.

(12.7)

本日は既設排水管への接続工事の日です。Today is the day for the connection work to the drainage pipe.

地面下40cmに埋まっている既設の排水管に2Fトイレの排水管を繋げる作業です。この作業は素人DIYでは歯が立たないと判断して外注しました。

The task involves connecting the drainage pipe from the second-floor toilet to the existing drainage pipe buried 40 cm underground. We decided to outsource this work as we determined it was too difficult for amateur DIY.

地面下はこの様な配管になりました。This is how the piping looks underground.

私達が壁から出した配管に接続完了です。The connection to the pipe we extended from the wall is complete.

掘った土を被せて地面下も完了し 何時でも排水を流せる状態になりました。After covering the dug-up soil, the underground work is complete, and the drainage system is now ready for use at any time.

この続きは我々DIYの二人の頑張りに掛かっています。プレッシャーが掛かりますが焦らずにやりたいと思います。つづく

The rest depends on the efforts of the two of us DIY enthusiasts. The pressure is on, but we want to take our time and do it right. To be continued…

(12.9)

本日は階段下収納とトイレの間の壁下地を作って  Today, I built the wall framing between the under-stairs storage and the toilet.

その壁の中に換気用配管と水道用配管を設置しました。つづく

I installed the ventilation and water pipes inside that wall. To be continued.

(12.12)

本日の作業は 水道管の外配管を繋ぐ作業と 配管に凍結防止用断熱材を取り付ける作業です。Today’s task is to connect the external water pipes and install insulation to prevent freezing

横引きは給湯器まで6メートル 配管は地中に埋める作戦です The horizontal piping extends 6 meters to the water heater, and the piping was installed underground.

配管が終わった所はパイプを土で埋めます The areas where the piping is completed will be buried with soil.

給湯器の下まで配管が出来ました  The piping has been completed up to the water heater.

給湯器の給水元栓を閉めて分岐用部品を取付けてトイレ用の水をここから貰います。Close the main water supply valve to the water heater, install the branching component, and use the water from the toilet

凍結防止断熱材を取付けました I have installed the insulation to prevent freezing.

給湯器下の配管を地中に埋めます I will bury the piping under the water heater underground.

二階への縦配管にも凍結防止用断熱材を取付けました I have also installed insulation to prevent freezing on the vertical piping to the second floor.

こんな感じです Something like this.

便器の背面の壁板を取付けて クロスを貼りました(クロス張りは、この家の御主人が実施) The wall behind the toilet was installed and wallpapered (the homeowner did the work).

この壁は便器を固定すると作業出来なくなる場所なので 先にクロス張り作業をしました。つづく

This wall was installed first because it would be difficult to work on once the toilet was fixed. To be continued.

(12.21)

換気扇とコンセントを取付けました   installed a ventilation fan and an electrical outlet

横壁の下地を作り壁を張って  Build the framework for the side wall and attach the wall panels

スイッチとコンセントを埋め込みました。つづく

I embedded the switch and the electrical outlet. To be continued.

(12.23)

本日の作業は 排水管と便器の接続、便器の固定、便器の組立てです。Today’s tasks are connecting the drain pipe and toilet, securing the toilet, and assembling the toilet.

接着剤で排水管の最終接続をします  I will make the final connection of the drain pipe using adhesive.

繋がりました It is connected.

便器を床に固定します  I will secure the toilet to the floor.

2本の専用ビスを使います I will use two special screws.

締め付け後に ビスカバーを付けます After tightening, I will attach the cover

タンクを便器に取付け組み立てます I will attach and assemble the tank to the toilet.

水道に付属の止水栓を取付けて Attach the included shut-off valve to the water supply

付属ホースで水タンクに繋ぎます Connect it to the water tank using the included hose.

便座を取付けます I will attach the toilet seat.

ペーパーホルダーを壁に取付けて 作動試験と水漏れ点検をしてトイレは使用可能になりました 年内の作業は終わりです。以後夜中は2階トイレを使えるので 楽になりますね。

“I attached the paper holder to the wall, conducted an operational test and checked for water leaks, and the toilet is now ready for use. The work for this year is finished. From now on, we can use the upstairs toilet at night, which will be more convenient.

壁紙はご主人がDIYする予定です。 つづく

The homeowner will DIY the wallpaper. To be continued.

(2025.1.30)

ご主人がクロスを仕上げました The homeowner finished the wallpapering.

扉ははクローゼットの時のままですが、クロス張りになりました The door remains as it was when it was a closet, but it has been wallpapered.

右側の扉を開けた所です This is the view when the right door is opened.

左の扉も開けた所です ”This is the view when the left door is opened.

便器の左 To the left of the toilet.

便器の右、綺麗に仕上がりました。

To the right of the toilet, it has been beautifully finished.

屋根裏収納のハシゴの修正 Repairing the attic storage ladder.

(2025.1.10)

屋根裏に上がるハシゴが時々引っ掛かるようになりました。The ladder to the attic sometimes gets stuck.

原因は折り畳んだ時の ハシゴのズレでした。 ”The cause was the misalignment of the ladder when it was folded

丁番の取り付けを調整すると接触しなくなりました。Adjusting the hinge installation prevented it from getting stuck.