ゴーヤ水やり watering

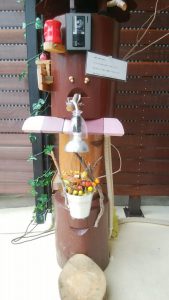
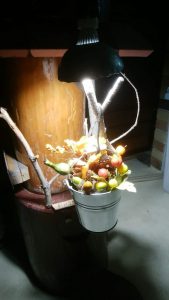
5月の連休にゴーヤをプランターに植えて順調に育っています。プランターで水やりを忘れると直ぐに弱るそうなので一泊旅行位は何とか凌ぎたいと思って考案したのが今回の作品です。

水道工事の廃材を使ってルートを試作します。

試作で行けそうなので、茶色に塗装しました。そうです、水源はエアコンの排水です。

塗装すると違和感ゼロですね。

廃材のみで作るので材料の一貫性が無いです。

プランターへの最後のホースは白色になりました。これでエアコン冷房運転すると排水がプランターに入りちょっとエコでしょうか?

キッチンに化粧シート makeup sheet in the kitchen

戸棚の扉が古く、劣化が目立つので化粧シートをネットで買って貼りました。白の鏡面仕上げシートです。The cupboard door was old and showing signs of deterioration, so I bought a decorative sheet online and pasted it on. It is a white mirror finish sheet.

ビフォアーを撮りわすれました。最後の一箇所が残っています。

いい感じになりました。作業責任者はカミサンです。
次に天板のステンレス部に大理石模様のシートを張ります。Next, place a marble-patterned sheet on the stainless steel part of the top plate.
かなり雰囲気が変わりました。 作業責任者はカミサンです。

植物たち potted plants

引っ越しをしたままになっていた我が家の植物たちは、鉢が小さくて窮屈そうだったり、ゴーヤ植えの準備を連休を利用してやりました。

これは、ゴーヤのプランターの台にしたいと思っています。

フェンスの端材を貼って

花屋さんからゴーヤを買ってきて植えました。

ゴーヤのベッド完成。

シンビジュームは鉢を一回り大きくしました。古い鉢から出し古い株を分離(抜いて)大きい鉢に引っ越ししました。


カポックも引っ越しました。古い鉢は下の穴から根がでていて抜けなかったので、鉢をハンマーで割って取出しました。2サイズアップ鉢に引っ越しました。

車庫のフェンス作成(完)Creating a fence at the entrance

車庫の両側にフェンスを作ることにしました。作業は4月になって暖かくなったら始めようと思います。I decided to build a fence on both sides of the garage. I plan to start work on it when it gets warmer in April.

今日は、準備作業として電気の使用量計(メーター)の向きを内側に向ける作業をしました。仕事から帰ってから実施したので、暗くなって完成しました。写真は次の朝撮影。As a preparatory work, I worked to turn the electricity usage meter (meter) inward.

はじめは、こんな感じだったのを
こんなふうに。
内向きになりました。
フェンスの板材が宅配便で到着しました。ウリンという木材で水に強い性質です。The fence boards arrived via courier. It is made of wood called urin and is resistant to water.
これは、フェンスの柱を立てるための金具です。コンクリートにアンカーボルトで固定します。This is a metal fitting for erecting fence posts. Secure to concrete with anchor bolts.
今日は、朝から始めて柱を立てて垂直と二本のレベルを取り板を貼ります。Set up the pillars, take the vertical and two levels, and attach the boards.
上から貼り始めました、右上に向きを変えた電力量計が見えます。I started pasting it from the top, and you can see the electricity meter with its orientation changed in the upper right.

片側が形になりました。
調子に乗って、反対側もやりました。こちらは左上に、ガスメーターが在ります。I got carried away and did the other side as well. There is a gas meter on the top left here.
正面から見たところ、まあまあですね。柱の付け根のガタを取ると完了です。Seen from the front

物置と宅配ボックス作成(2019-Apr)Creating a storage room and delivery box

1階の車庫の一部を物置にして、大工道具など整理をしたいと思います。

先ずディアウオールを使って柱を立てました。

I would like to use part of the garage on the first floor as a storeroom to store carpentry tools and other items. First, I erected a pillar using deer wall.

茶色の部分、二階で取り外したパーティーション用折れ戸と3階で取り外した扉をリサイクルしたものです。

手前側は塩ビの波板を張りました。昼間の明るさを取り入れたかったので白の半透明を採用してます。The brown parts are recycled partition doors that were removed on the second floor and the doors that were removed on the third floor. The front side was covered with corrugated PVC board. I wanted to incorporate the brightness of daytime, so I chose a white semi-transparent color.

物置の中に棚を作ることで収納、作業効率をアップできました。正面奥のハシゴのように見えるものは、宅配ボックス機能を追加します。By building shelves inside the storeroom, we were able to improve storage and work efficiency. What looks like a ladder at the back of the front adds a delivery box function.

宅配boxの内側の作業を少し進めました。荷物を入れる時に中が丸見えにならないように工夫をします。We have made some progress on the inside of the delivery box. When putting your luggage in, try to make sure that the contents are not completely exposed.

外扉を開けて、中扉をダンボールで押すとダンボールがポトリと中に落ちる設計です。一度入れたダンボールは取り出し不能なので、通常鍵を設けるようですが省略することにしました。

The design is such that when you open the outer door and push the inner door with a piece of cardboard, the cardboard will fall inside. Since it is impossible to take out the cardboard once it has been put in, I decided to omit the key, although there is usually a key.


これで完成です。やってくる宅配業者にお知らせします。

コタキナバルの海岸で拾った枯木と珊瑚のカケラと貝殻で表札作ってみました。

それから、この物置には、秘密基地2という名前をつけました。ドアには飾りを付けました。Then, I named this storeroom Secret Base 2. The door was decorated.

上は名前で下が…
下は兵隊さんかな?奥さんの雰囲気でこうなりました。
兵隊さんが乗っている板を、斜めにして安定性をよくし、小さな子でも見やすくなりました。