車庫のフェンス作成(完)Creating a fence at the entrance

車庫の両側にフェンスを作ることにしました。作業は4月になって暖かくなったら始めようと思います。I decided to build a fence on both sides of the garage. I plan to start work on it when it gets warmer in April.

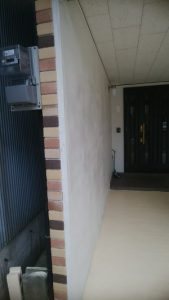
今日は、準備作業として電気の使用量計(メーター)の向きを内側に向ける作業をしました。仕事から帰ってから実施したので、暗くなって完成しました。写真は次の朝撮影。As a preparatory work, I worked to turn the electricity usage meter (meter) inward.

はじめは、こんな感じだったのを
こんなふうに。
内向きになりました。
フェンスの板材が宅配便で到着しました。ウリンという木材で水に強い性質です。The fence boards arrived via courier. It is made of wood called urin and is resistant to water.
これは、フェンスの柱を立てるための金具です。コンクリートにアンカーボルトで固定します。This is a metal fitting for erecting fence posts. Secure to concrete with anchor bolts.
今日は、朝から始めて柱を立てて垂直と二本のレベルを取り板を貼ります。Set up the pillars, take the vertical and two levels, and attach the boards.
上から貼り始めました、右上に向きを変えた電力量計が見えます。I started pasting it from the top, and you can see the electricity meter with its orientation changed in the upper right.

片側が形になりました。
調子に乗って、反対側もやりました。こちらは左上に、ガスメーターが在ります。I got carried away and did the other side as well. There is a gas meter on the top left here.
正面から見たところ、まあまあですね。柱の付け根のガタを取ると完了です。Seen from the front